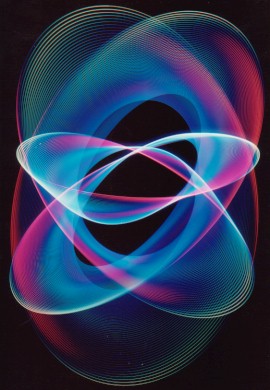
Getting Started on Pendulum Photography
Part 2 of 2
Set the camera's aperture to f11 or f16 for 100 ISO film. That's a ballpark exposure which can be adjusted once you've seen the results of your shoot. The camera aperture required is affected by how bright the bulb of your flashlight is and how dark or bright you wish your image to be. So it's best to bracket here and to analyse the results and see which aperture works for you.
Okay, now we're in business.
To make your first pendulum pattern place your focussed camera on the floor so the lens is directly underneath the position of the flashlight when it's at rest. This will approximately center the pendulum pattern in your the viewfinder if your camera lies flat on the floor and not angled. Then turn the flashlight on and twirl it in a circular path.
The room lights are then turned off to place the room in darkness. The shutter of the camera is then opened. Make a note of the starting time.
After, say, five or ten minutes, close the shutter by releasing the cable release and turn the lights back on. Voila, you've made your first pendulum pattern.
A few points to make
Length of exposure
First, how long do you keep the shutter open for?
Five to ten minutes is a good starting time but it's a creative decision which is up to you. I've shot from a minute or two to twenty minutes or longer. Experiment with various times and see which ones give the look you like.
Do Not Touch!
Second, it goes without saying that the pendulum should be left undisturbed as it swings.
That doesn't mean you can't stop and restart the pendulum in the same shot, overlap images or nudge it for 'special effects'. That creative choice is yours, but I keep my creative interventions to a minimum and never touch the pendulum once it's in motion as it's a near perfect tool and I'm an imperfect human.
The creative interventions I indulge in are usually limited to the camera, such as placing different filters over the lens to create lines of different color or brightness or periodically placing a card over the lens to momentarily block out the light to create series of concentric bands.
Keep a record
Third, it's important to make notes of each shot such as recording the aperture and duration of exposure. In this way when you get your results back you can analyse and evaluate them to plan your next pendulum shoot.
Although the pendulum is sensitive to outside vibrations you don't have to be too concerned about passing trucks or slamming doors at this stage of pendulum photography. Such vibrations usually aren't detectable in the final image unless the image is regular in appearance and the disturbance significant enough.
Well, that's about it.
References
The following three articles also describe this technique if you're keen and you may find them useful, especially the 1981 PhotoGraphic article which is quite a clear description and extends the instructions given above. The second and third articles venture beyond the simple single line pendulum configuration. Good luck!


