Idiot's guide to taking long exposure photographs
On this page I attempt to describe, as simply as possible, how you can go about creating simple bulb photographs.
I also provide a "Trouble-shooting guide to bulb photography" on another page in the hope that this will be an aid to learning once you've started.
One of the simplest bulb photographs to take, and a very good place to start, is inside the place where you live (assuming you have electric light).
Equipment
For the following exercise, you will need three pieces of camera equipment:
- A tripod;
- A "cable release"; and
- A camera that allows you to (i) keep the lens open for more than one second and (ii) that allows you to attach the other two pieces of equipment to.
It's also a good idea to have a stop watch or some watch with a second hand, but for this exercise you can simply count elephants if you want.
Preparation
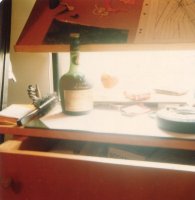
The photo above was taken with one low wattage globe in the room (shaded). The flourescent desk light is the major light source.
Using the photo above as a guide:
- Mount the camera to the tripod.
- Choose a stable location for the tripod.
- Make sure the tripod legs are pulled out (not just lengthened - but pulled out from the center) to make the tripod as stable as possible. There is nothing more disappointing than getting half way through a good shot and having the tripod decide that it's time to settle into place.
- For a close up shot (like the one above) choose a small aperture (ie. a high number f-stop such as 11, 16 or greater). The reason for this is to create a large depth of field. In this way as much as possible is in focus as easily as possible.
- Attach the cable release.
Execution (taking the shot)
For the sake of experimentation, assuming the camera is about one metre (3 feet) from the subject (as in the above photo) and you have set the aperture to f16, take three shots lasting 20; 40 and 80 seconds.
While taking each shot it is imperative that you do not touch the tripod, the camera or shake the floor or object on which the tripod is placed. If you do, and the camera returns to exactly where it started you'll probably be okay. But, more likely, it will come to rest somewhere (ever so slightly) different to where it started and the result will be a double image.
That's about all there is to it really.
Be daring!
You can try the following even before you've seen the results of your first experiment.
Adjust the aperture to a lower number (say f4). This allows more light to come into the camera more quickly. In other words you need to compensate by reducing the length of time you leave the lens open for. Given that f4 is 4 "light stops" lower than f16, that means you could, in theory at least, take 3 shots of 5, 10 and 20 seconds and wind up with three shots that look the same as the first 3.
Try it and compare the results.
The first and most obvious difference will be seen in the depth of field. When you are this close to your subject (at arm's length) a change of 4 stops of aperture has a significant difference in how much of the shot is in focus.
Depending on what you are taking a shot of you will most likely prefer one aperture over the other. If it is a single item as a subject you will want a small depth of field.
Enjoy!


